
Perhaps it seems self-evident that the tile patterns you select need to be balanced when installed. And yet, simply based on photos readily available, balance and common sense don't always go hand-in-hand.
Especially when your tile choices come in so many more sizes, shapes, patterns, and colors than in the past. Along with this availability comes creativity with endless possibilities.
Today we will focus on one of these options – the pattern. Combining these tiles, whether square or rectangular, with an offset pattern creates a unique visual many times not realized in its square or stacked design.
Note: Before you go further, please be warned. The images you're about to see may disturb you.
Tile Patterns Recap
Let's recap the ANSI Standards best practices related to tile patterns.
>> See ANSI Standards: A Tile Installer's Best Friend!
When you use an offset pattern, it is best to follow the American National Standards Institute (ANSI) guidelines. ANSI A108.02 section 4.3.8.2 states,
“For running bond/brick joint and any offset pattern (i.e., non-continuous grout joints) utilizing tiles (square and/or rectangular) where the side being offset is greater than 15 in. (nominal dimension), the offset pattern will be a maximum of 33% unless otherwise specified by the tile manufacturer. If an offset greater than 33% is specified, the specifier and owner must approve the mock-up and lippage.”
The ANSI guidelines provide even more guidance to the installer. ANSI A108.02 section 4.3.1 states,
“Center and balance areas of tile, if possible.”
And ANSI A108.02 section 4.3.2 states,
“An excessive amount of cuts shall not be made. Usually, no cuts smaller than half size should be made. Make all cuts on the outer edges of the field.”
However, when offsetting the pattern by 33%, it can be challenging to provide equal cuts on each side of the wall being laid out and not have less than a half tile in the next course.
In this case, the one-half tile or larger rule may need to be set aside. When this occurs, always obtain the owner’s approval on the pattern layout to be certain it meets their expectations.
>> See Why a Tile Installation Mockup is Really Necessary
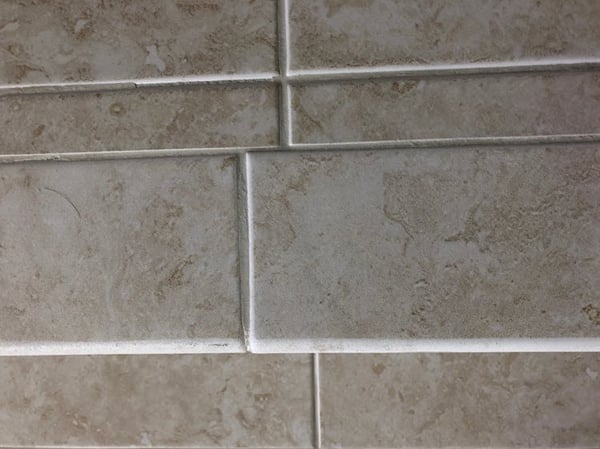
Poorly Balanced Intersecting Wall Tile Patterns
The problem gets worse if two intersecting walls meet at the inside corner, with each wall ending up with small cuts as seen in the photo above.
In tile industry slang terms, you have what is known as a sliver cut or rat tail.
These cuts look really bad to the unsuspecting consumer who views this installer error. He or she may not know what is wrong with the situation in the corner, but that consumer knows it doesn’t look good.
Sadly, the regrettable result is that when this same consumer next looks for an appropriate product for a home or business remodel, you can be sure s/he will remember that unsightly installation and comment, “If that is the way tile looks, I don’t want it in my house.” If, and when this occurs, everyone in the tile industry loses.
Combining Tile Installation Expertise with Common Sense
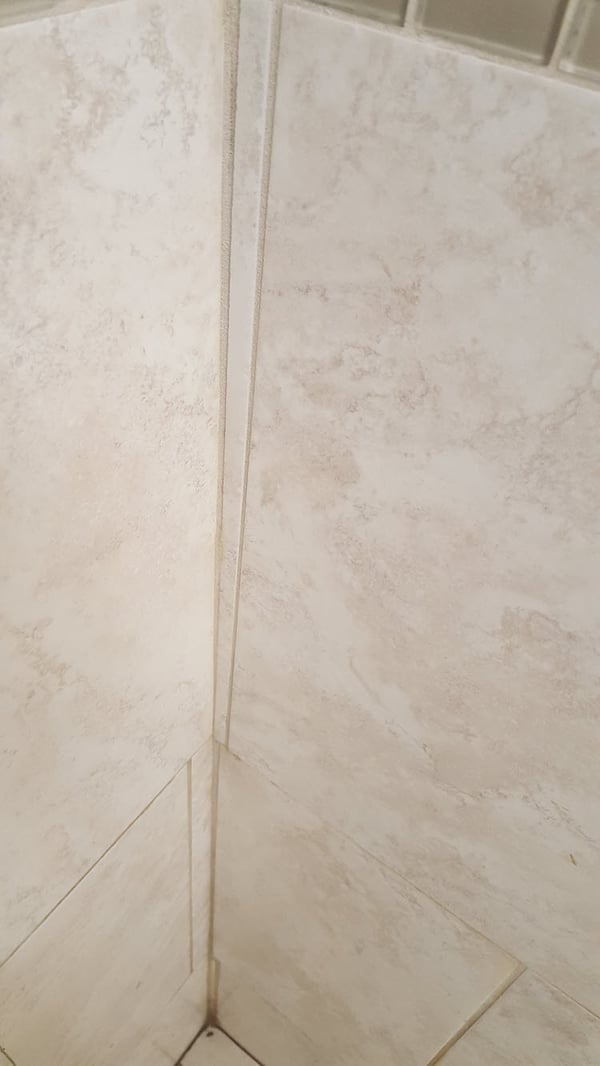
There are a couple of other issues involved in this installation, suggesting that this installer isn't Qualified Labor:
- None of the grout joints is the same size.
- The corner is not plumb, which causes the sliver cut to get smaller going from top to bottom.
- The inside corner is grouted rather than being a soft joint with 100% silicone sealant.
>> See Quick and Easy Movement Joints... the Right Way
Now for the common-sense part of this situation.
Had the installer shifted the layout just 3/4” on each wall, the rat tails would disappear, and the consumer would have no reason not to select tile for the next project. This is a win-win for all involved. Right?
How Would You Address These Tile Pattern Installations?
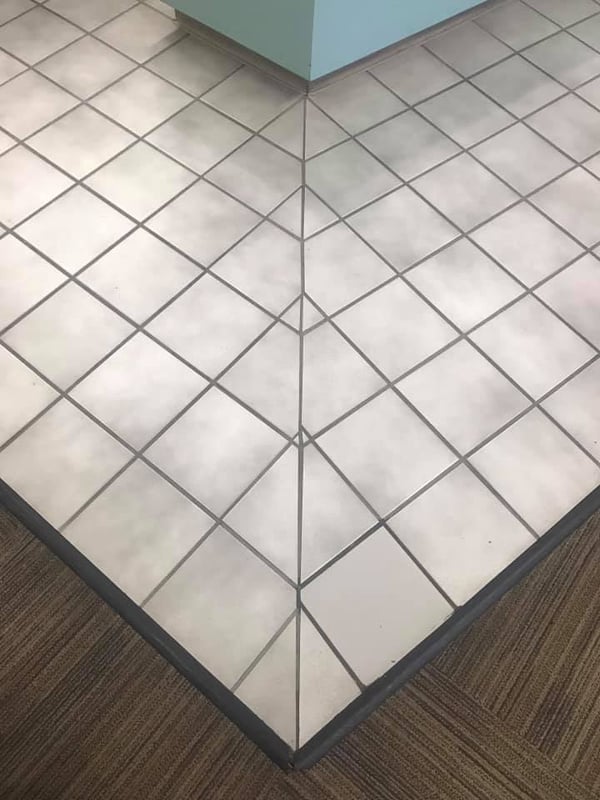
In response to Is Your Tile Layout Centered and Balanced, With No Small Cuts?, reader Michael Bohn shared this image of a job he noticed in Snowmass Village, Colorado.
How would you improve this layout?

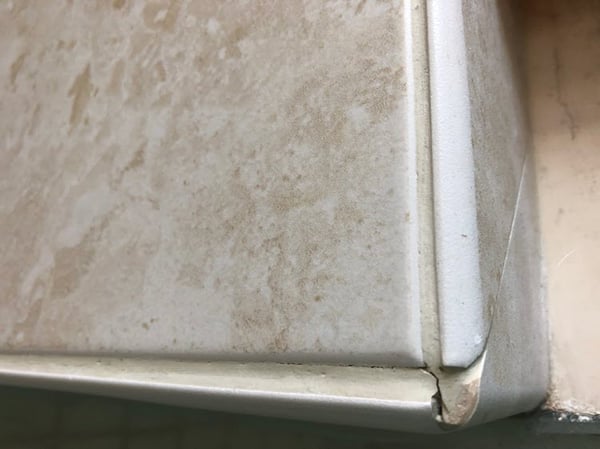
Here's another installation that tile industry expert Chris Kain from TEC Specialty Products noticed in his travels.
Comments?
And what about this last image? What would you change?
Additional Resources for Tile Patterns
You should in no way fear tile patterns. Quite the opposite! In fact, you'll enjoy these additional resources that feature an exciting range of patterns for your consideration:
>> Floor Tile Patterns Perfected
Ensuring Your Tile Patterns Are Successful
It shouldn't come as a surprise to you that the hands-on test for the Certified Tile Installer program places a great deal of attention on tile layout and ensuring that the final installation is centered, balanced, and with few cuts.
>> See Grading the Toughest 25 Square Feet of Tile You'll Ever Install (Video)
If your tile installations suffer from a lack of balance, consider enrolling in the Certified Tile Installer (CTI) program, where you will learn this and other proper techniques used by Qualified Labor. Do yourself and your customers a favor and become a part of this elite group of tile installers.
Thanks for reading!
