
If you're in the tile business, you're surely aware of how important it is to obtain the required mortar coverage.
And, you've probably noticed that achieving that coverage has become more challenging as tile sizes and the diversity in tile types increase.
Diversity is wonderful for enabling stunning tile installations. However, each of these products has different requirements in order to achieve the required mortar coverage, and that's where selecting the right trowel notch comes into play.
What's the Goal for Obtaining the Required Mortar Coverage?
When it comes to achieving acceptable mortar coverage, you're looking to meet the ANSI A108 requirement:
For ceramic and porcelain tile, the requirement is 80% mortar coverage in dry areas and 95% in wet and exterior areas. For natural stone tile, the required coverage is 95% whether it is installed on the interior, exterior, wet, or dry areas.
In other words, you want to eliminate voids under the tile.
>> See Do You Have Enough Mortar to Accommodate Most Tile Warpage?
Getting the Coverage You Need Under Large Wall Tile
What Troweling Technique Should You Use?
The method of applying thin bed and Large and Heavy Tile mortars has changed over the years. Today many installers use (or should be using) the straight-line troweling method as described in the National Tile Contractors Association (NTCA) Trowel and Error video.
>> See How to Correctly Trowel Mortar When Installing Tile?
This method requires that the mortar be keyed (or forced) into the substrate with the flat side of the trowel and then notched in one direction, either east to west or north to south. The tile is then moved in a perpendicular motion to the mortar ridges. This back-and-forth motion lays the ridges into the valleys normally yielding full mortar coverage between the substrate and the back of the tile.
This process has been in use for well over twenty years and has solved many of the mortar coverage issues previously found in the field.
For Rectangular Tile, Spread the Mortar in the Same Direction as the Short Side of the Tile
With the ever-growing size of tiles found in the marketplace, the need to achieve full mortar coverage has become even more important. To achieve full mortar coverage, the air found in the valleys of applied mortar must find its way to the nearest grout joint. Common sense would tell us that finding the route to the closest joint would speed up this process. This is especially necessary with rectangular tile.
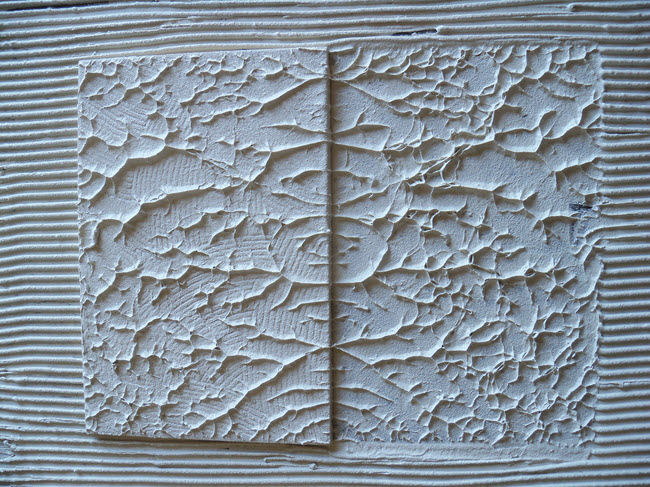
While still using the straight-line troweling method, we need to modify our technique just a bit. The change is that the mortar is now spread in the same direction as the short side of the tile.
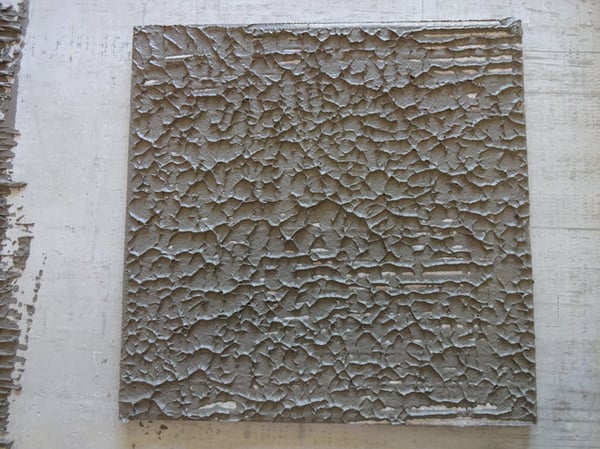
By doing this, the distance the air must travel is reduced. Moving the tile in the back and forth motion will bring the ridge into the valley thereby forcing or “burping” the air out from under the tile. If you listen carefully during this process, you can actually hear the air being forced out.
As you can see in the image above, the air is gone, the ridges are collapsed into the valleys and full coverage is achieved.
Occasionally Lift an Installed Tile to Verify the Required Mortar Coverage
While this method normally works really well, there is one more critical step in the process:
Occasionally lift an installed tile to verify that you’ve gotten the coverage you need.
This simple test will ensure you are well covered and provide the quality your customers deserve.
Which Trowel Notch Works Best?
With the popularity of large format tile continuing to grow comes the necessity of providing an adequate supply of thin bed or Large and Heavy Tile mortar to properly support and bond the tile. The question is which trowel notch works best?
When searching for a trowel to spread this mortar, the availability can be overwhelming. There are trowels with square notches, round notches, zipper notches, and on and on. But again, which one works best and provides the best mortar coverage?
When installing large format tile (a tile with any side greater than 15”), generally a larger notched trowel is used. This makes perfect sense. Right? Larger tile means more mortar, hence a larger notch. And in most applications, this is true. But if we are using the time-proven Trowel and Error video method (moving the tile in a back-and-forth motion perpendicular to the straight-line mortar troweling), we may have a problem.
If a large format tile is being installed with a 1/8” grout joint, there is a limited amount of room to move the tile in the back-and-forth motion.
- With a narrower notched trowel, the amount of movement necessary to collapse the ridges into the valleys is less.
- But, with a wide notch such as a ½” x ½” x ½” trowel (which works well when the tile is properly moved), the amount of movement required is significantly increased.
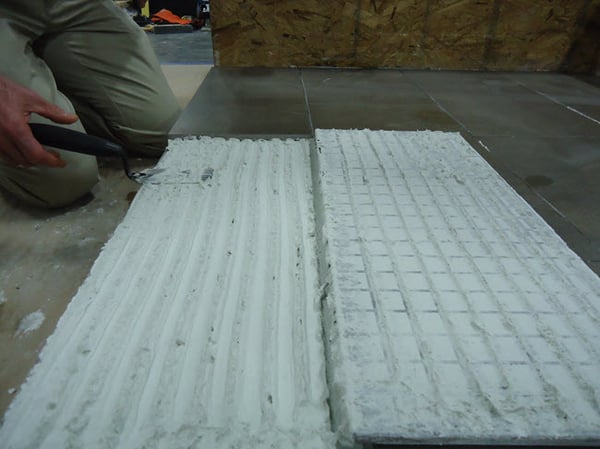
As you can see in the images above and below, the 12” x 24” rectified porcelain tile was installed with a 1/8” grout joint. The ½” notch that was used provided plenty of mortar to achieve the required (80%) mortar coverage, but what happened?
The tile was not (or could not be) moved far enough, so the back of the tile has huge straight-line voids! This is a failure waiting to happen, possibly leading to hollow-sounding tile, loss of bond, and cracked tile.
Also notice that the installer back-buttered the tile which increased the bond strength, but it did not increase the mortar coverage on the tile.
In the future when using a large notched trowel, be certain to move the tile back and forth perpendicular to the trowel ridges at least the width of the notch in each direction, and good coverage should be yours.
However, get into the habit of occasionally lifting a tile to ensure that you’ve got it. This quick and easy test will keep the money you make in your pocket rather than paying for a repair or replacement.
Small Trowel Notch vs. Large Trowel Notch: Which Is Best?
Let's further explore trowel notch sizes.
In order to meet the ANSI A108 requirement for mortar coverage (80% in dry areas and 95% in wet and exterior areas), it is extremely important to select the trowel notch that provides the appropriate amount of mortar to properly bond the tile to the substrate.
- For standard thin-bed mortars, the minimum amount of mortar after the tile is embedded is 3/32” while the maximum mortar thickness is about 1/4” depending on the manufacturer's recommendation.
- When the new Large and Heavy Tile (LHT) mortars are used, the maximum mortar thickness after embedding the tile is 1/2”.
Regardless of which mortar is used, there are two critical items for consideration.
The first is that neither of these mortars should ever be used to “fix” the floor, whether it requires filling the low spots or feathering out the high points in the floor. It is best to use the proper flash patch or self-leveling underlayment (with primer) to make these corrections. When repairing walls, a good-quality flash patch should work well.
>> See The Ultimate Guide to Underlayment for Tile
The second item is to select the trowel notch that will provide enough mortar to bed the tile which meets or exceeds the ANSI Specification while not causing the excessive mortar to squeeze up between the tiles.
No 'One Size Fits All' Trowels
There really is no “one size fits all” trowel for every installation.
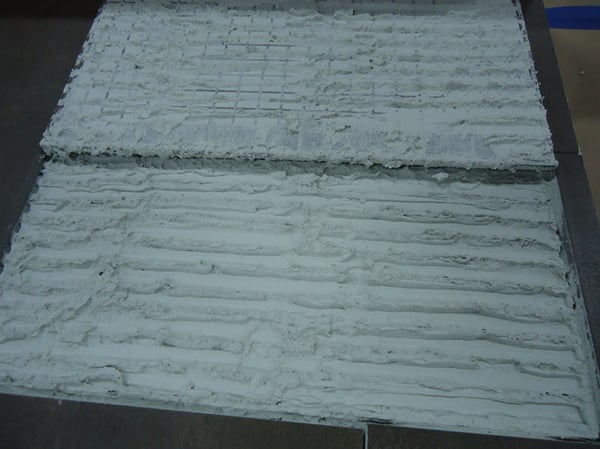
The only way to make this decision is to experiment with a variety of trowel notch designs and depths. For this example, the installer’s basic notch, the 1/4" x 1/4” provides reasonable mortar coverage as seen in the photo below.
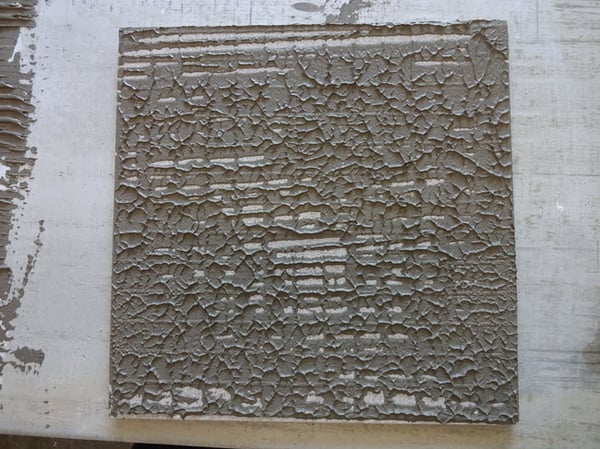
But notice the difference in the mortar coverage received by increasing the trowel depth by just 1/8”.
The 1/4” x 3/8” notch in the next image below gives significantly better coverage which could mean the difference between success and failure.
Always Test the Trowel for Suitable Mortar Coverage
The lesson here is always to test the trowel to be used on each job substrate to ensure adequate mortar coverage.
Eliminating voids under the tile will solve the issue of hollow-sounding tiles and potentially broken tiles on the job.
How Will You Select Your Next Trowel Notch?
What has your experience been with achieving suitable mortar coverage and experimenting with different trowel notch sizes?
Thanks for reading.

Note: We originally published this article on 08/21/2018, and have updated it.