Sometimes, the best way to explain how important it is to work with a Certified Tile Installer (CTI) is to show you how not to install tile on floors, walls, and in showers.
This article focuses on a real-life situation where those doing the work (aka tile placers) clearly did not have the knowledge, expertise, or experience to deliver a high-quality tile installation. They were not CTIs. Although originally published on 9/27/2016, it continues to speak directly and strongly about unqualified labor and the perils of poorly installed tile.
Let's explore this master bathroom installation to better understand what went wrong.
>> See Hiring a Tile Installer? Here's What to Look For.
Assessing this Master Bathroom Tile Installation
The first step is to observe this tile installation and assess the deplorable work.
This is a newly installed residential master bathroom featuring a whirlpool tub and a tiled walk-in shower.
Installation Issue: Excessive Tile Lippage on Floors
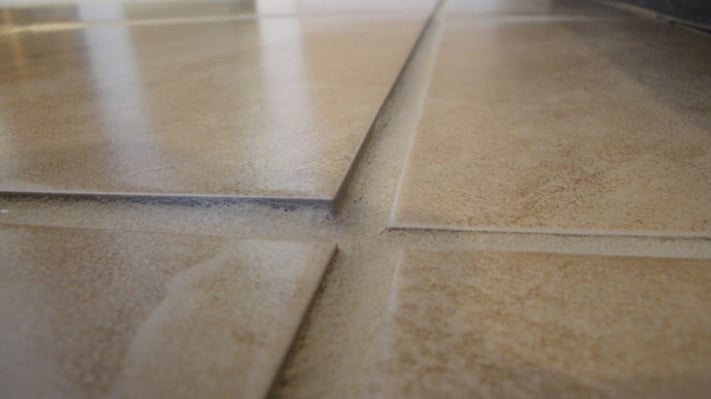
As you walk into the master bath, you immediately notice that the floor tiles are not in line with one another. They exhibit tile lippage which is defined by the Tile Council of North America (TNCA) as,
Variation in the height of adjoining tiles is called lippage. This is defined in the ANSI (American National Standards Institute) standard A108.02, Section 4.3.7: "Lippage refers to differences in elevation between edges of adjacent tile modules."
>> Be sure to read the Tile Council of North America's (TCNA) explanation of lippage which describes the ANSI standards for allowable lippage and warpage.
The picture below shows the bath floor which exhibits excessive lippage, affecting the integrity of the tile installation.
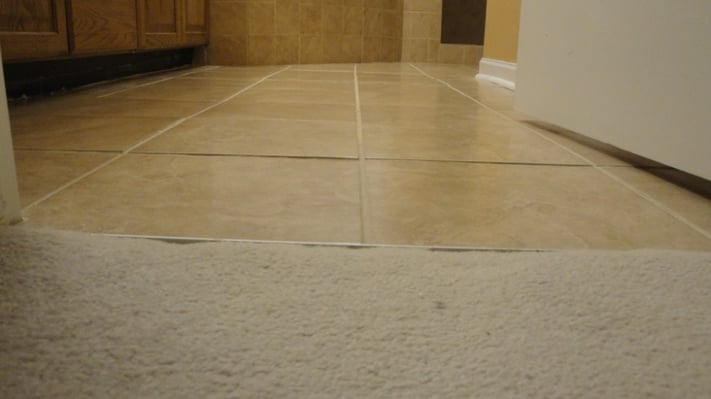
If you get even closer to the floor, you'll notice that the height difference between floor tiles ranges between two to three-quarters.
In other words, don't wear high heels in this space unless you want to catch your heel... 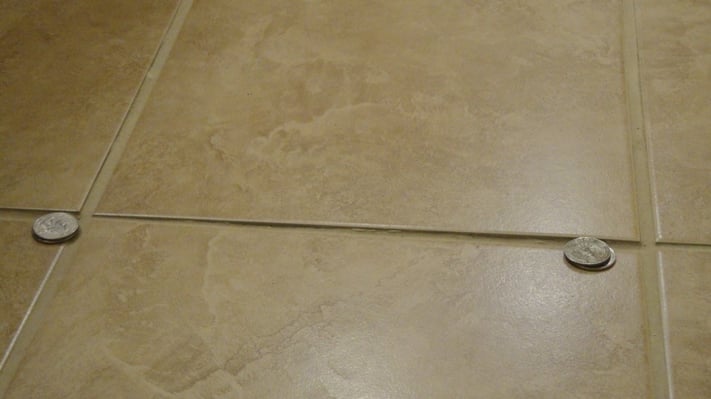
This three-quarters difference would surely be unpleasant to walk on in bare feet.
Not to mention that it's intensely unsightly!
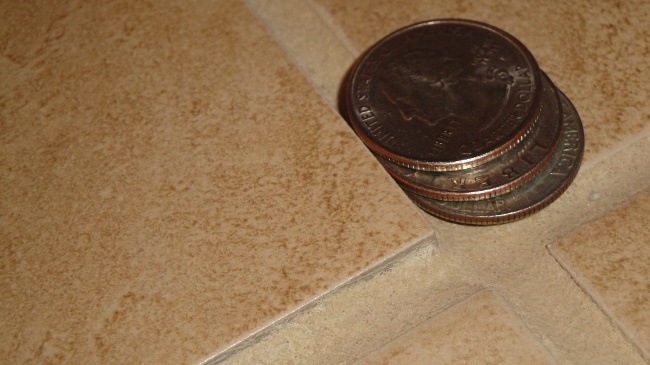
Spoiler Alert: you'll notice a lot more lippage in the images ahead!
Installation Issue: Tub Surround Tiling And Shower Wall Tiles Were Not Set Straight
Qualified tile installers (CTIs) know how to measure and prepare a layout that takes into account angles, and tile patterns, as well as proper proportions. In fact, that ability is what creates a beautiful and harmonious end result.
Tiles come in consistent sizes that will need to be cut to properly cover a floor, wall, or shower. Tile needs to be installed in a consistent pattern with parallel and perpendicular elements.
In this particular master bath, the tile was not installed in consistent parallel patterns, angles did not match and any inconsistencies were filled in with grout.
Unfortunately, this "tile placer" used grout to compensate for incompetence.
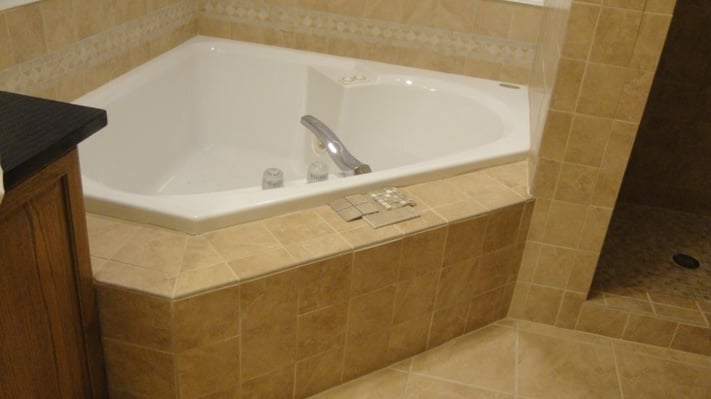
In this other view of the tub, you can see the unsightly wide grout joint between the tub deck and the cabinet. This joint should have been a neat and consistent size which is then filled with a flexible sealant.
Did you see the wall tile lippage along the end of the shower wall?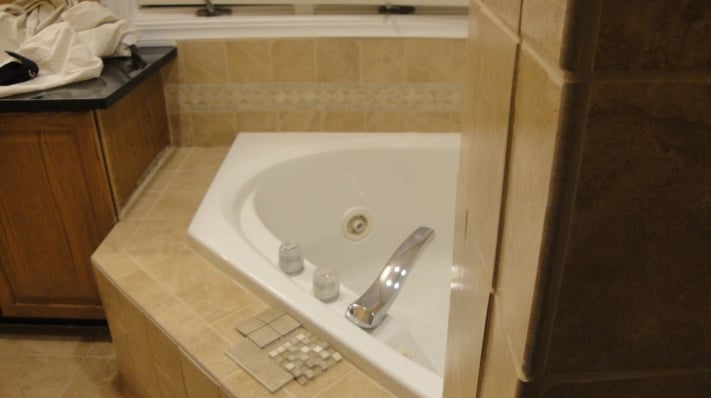
In the image below, notice the excessive grout joint that this "tile placer" used at the top of the shower wall.
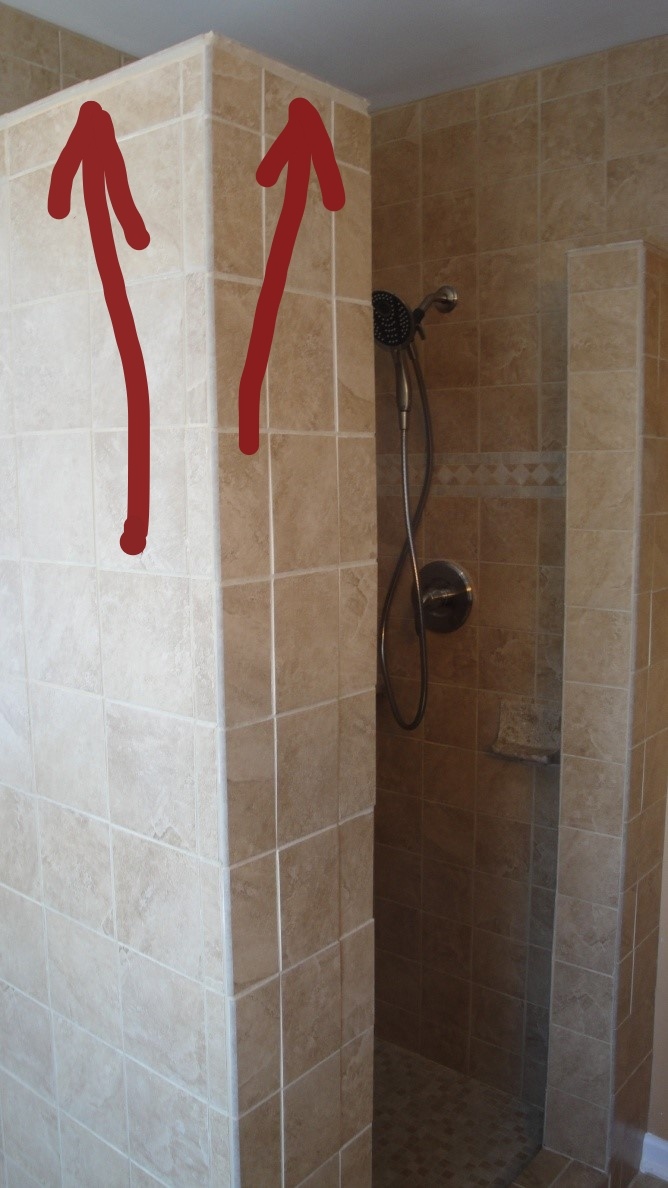 Did you catch the lippage along the wall?
These next few images will disturb you even more! They highlight the use of excessive grout.
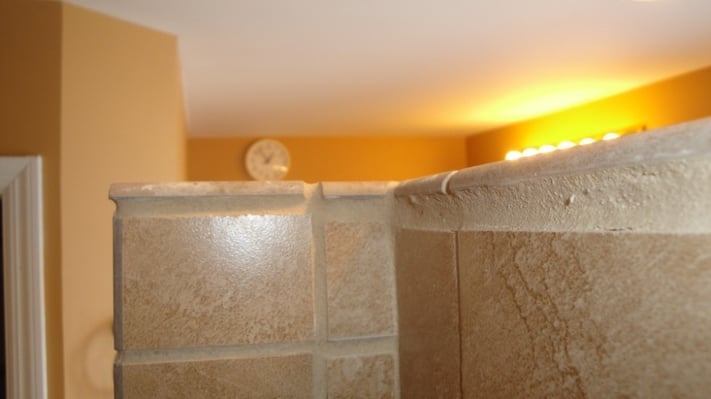
This close-up picture of the top of the wall shows how large the grout joint ended up and also how the grout joint size changes from wall to wall.
The image below shows the shower valve protruding from the wall tile which the "tile placer" filled in with grout.
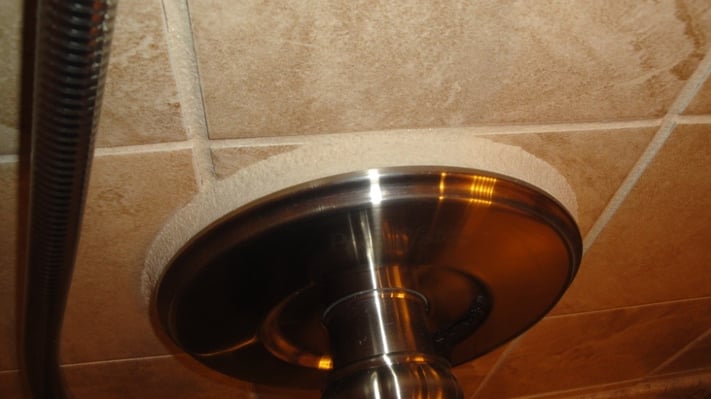
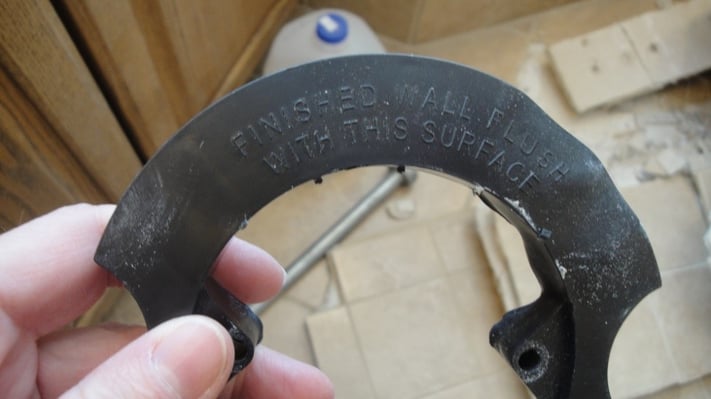
It should be flush with the wall tile as the temporary plastic shower faucet ring instructs.
Above, we mentioned the importance of tile lining up.
In fact, this skill is one of the hands-on test requirements of the Certified Tile Installer program. Installers need to know how to create geometric designs and install them properly so as to avoid what you see in the image below... a misaligned grout joint.
>> See What's the Certified Tile Installer Program?
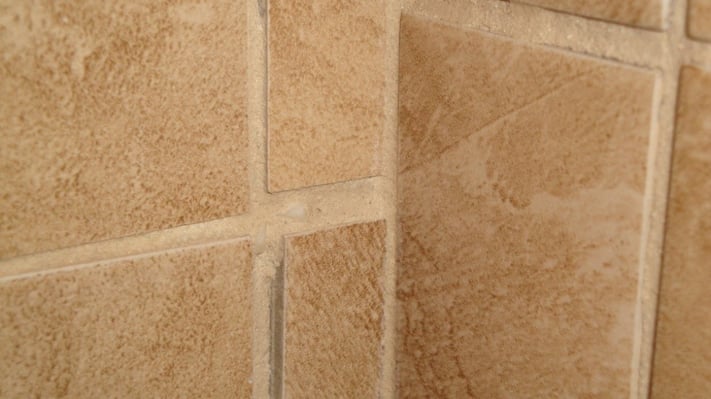
If you look closely at the image above, you'll notice a spacer showing through the grout. This is typical of the entire installation project.
Not to mention what you see in the image below where the wall trim does not line up properly.
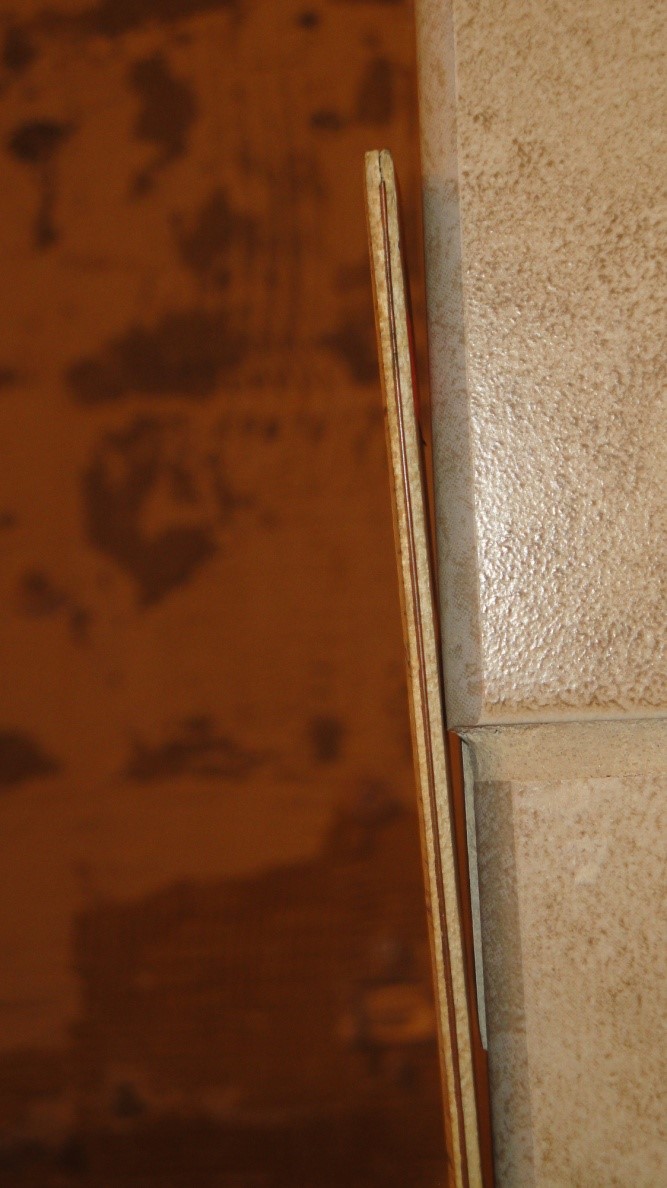 Other Installation Issues: Improper Mortar Coverage, Missing Grout, and Shower Pan Leaks
The assessment we've gone through has focused primarily on what is immediately obvious in this master bathroom tile installation.
A full assessment, though, goes deeper.
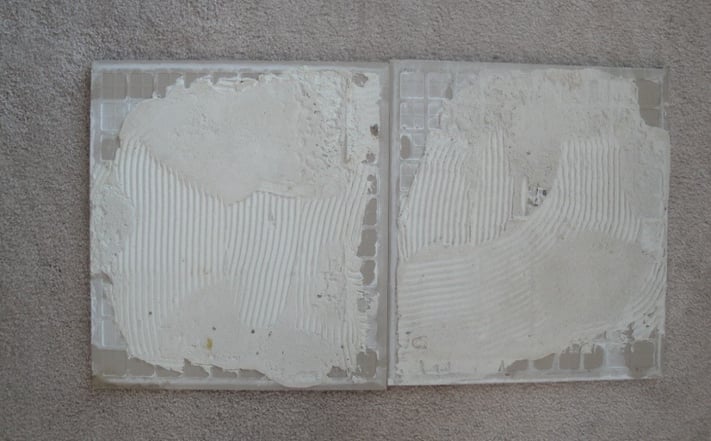
In fact, it goes beneath the tile to uncover inadequate mortar coverage (minimum of 80% in dry areas) on the tile as you see in the image below. Improper mortar coverage affects the integrity of the overall installation resulting in cracked and hollow-sounding tile.
>> See How to Correctly Trowel Mortar When Installing Tile?
The shower floor shows signs of missing grout which suggests bigger issues with the shower pan installation.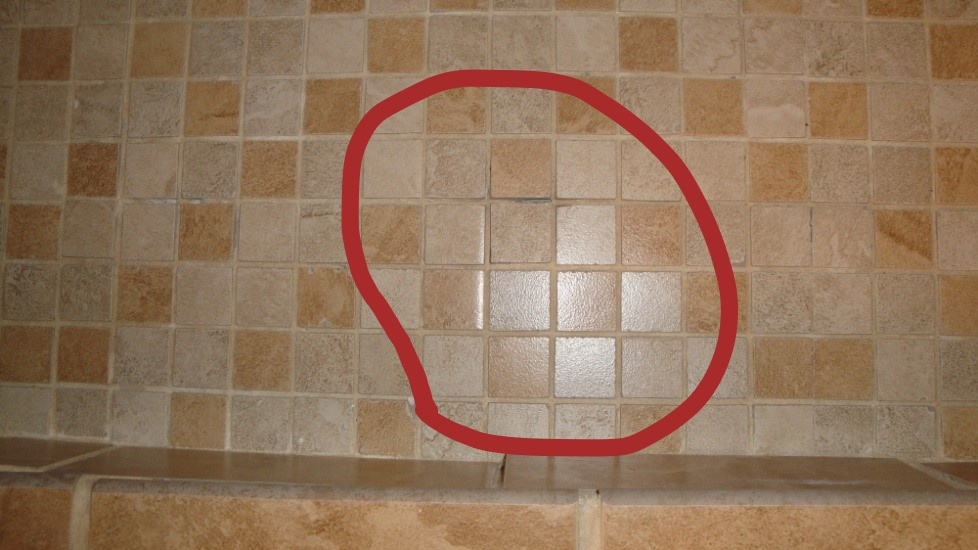
Sadly, the shower pan shows signs of leaking, caused by improper installation.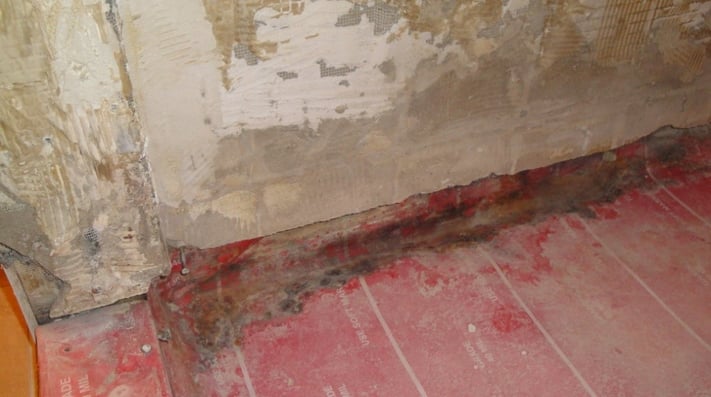
A critical aspect of a proper shower pan installation is ensuring the integrity of the waterproof barriers so water and moisture from the shower don't compromise the construction materials behind the wall or under the floor.
Further inspection of this master bath showed that the shower pan membrane was installed incorrectly and that screws had been driven through the membrane which is not permitted.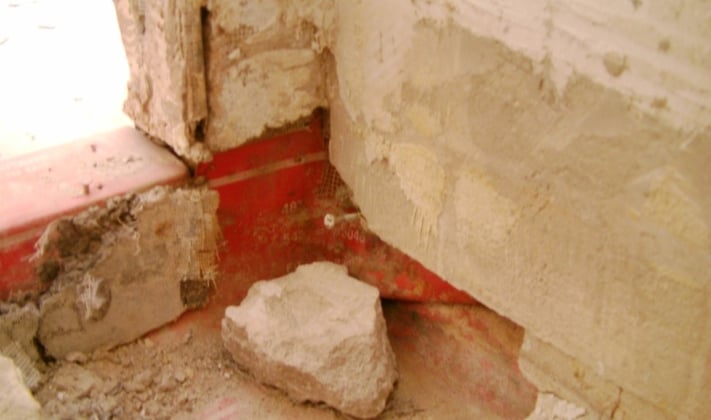
These installation errors will affect the performance of a shower creating moisture and mold problems.
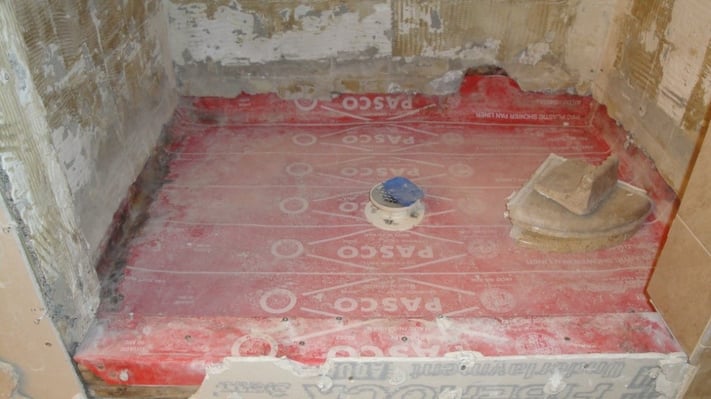
Note that the Advanced Certifications for Tile Installers (ACT) program includes a test focused on shower receptors.
Best Practices for Avoiding Tile Installation Issues
Having read through this real-life example, you shouldn't be surprised to hear that this is how not to install tile on floors, walls, and in showers.
Instead, we encourage you to work with a Certified Tile Installer (CTI) who knows how to install tile into freshly combed mortar, using a back-and-forth motion to ensure full mortar contact on the back of the tile, while maintaining joint alignment and spacing.
As Qualified Labor, CTIs know that the average mortar coverage for tile installed in dry areas is 80% and 95% in wet areas. Natural stone tile requires 95% coverage in both wet and dry areas with no voids within two inches of the corners.
CTIs not only know the industry standards and best practices, but they also ensure that your tile installation will look beautiful, and perform well for a very long time. What's not to like about that?
Thanks for reading and helping to spread the word about Qualified Labor.
Special thanks to Dan Welch, Welch Tile & Marble, for sharing these images.
Note: This article was originally published on 9/27/2016 and has been updated.

