

Lippage occurs entirely too often, making three specific hazards way too prevalent, and definitely ones you should avoid. More specifically,
- The hazard of having tile installations rejected,
- Creating serious injury hazards,
- Hazardous and objectionable visuals that affect everyone involved
What is Lippage?
Lippage occurs when one tile edge is higher or lower than the adjacent tile.
The topic receives a significant amount of coverage in written documents as well as everyday conversation because it occurs entirely too often.
Lippage Has an Allowable Limit
According to the chart on “Flatness and Lippage” found in the TCNA Handbook, lippage can be measured and has an allowable limit.
For Pressed Floor and Porcelain Tiles, of all sizes, with a grout join of 1/16” to less than ¼”, the allowable lippage is 1/32”
When Can Lippage Occur?
Lippage can occur in the following tile installation scenarios:
- Where an offset pattern is required using tiles that are 15” or longer and may have one or a combination of these situations present;
- The floor substrate is not flat to 1/8” in ten feet, which is required under the ANSI Standard A108.02 – 4.1.4.3.1;
- The inherent warpage of the ceramic or porcelain tile causes the tile to bow up in the middle, which is controlled under the ANSI A137.1 Standard;
- The offset is greater than 33% as found in the ANSI A108.02 – 4.3.8.2, or
- Installer error occurs.
>> See Is Your Floor or Wall Flat Enough for Large Format Tile?
The 3 Hazards of Lippage
1. Lippage Can Be Grounds for an Installation Job to Be Rejected
The first hazard is that one or more of the above mentioned standards has been violated and can be grounds for the job to be rejected.
>> See Offsets, Grout Joints and Customer Expectations
2. Lippage Can Lead to Serious Injury
The second is that a serious injury may occur if someone trips on the high tile. In this case, the installer is responsible if someone falls and could be involved in an expensive lawsuit.
>> See How Not to Install Tile on Floors, Walls and in Showers
3. Lippage Looks Bad
And finally, it looks really bad for the installer, to the customer and for the entire tile industry - especially when you factor in wall wash lighting, as you'll learn more about below.
An Example of the Hazards of Lippage
Here's an example.
In the photo above, you see evidence of lippage in a commercial dining area where the movement of the chair leg across the high tile edge has caused it to chip in several places.
If the chips are significant enough, they could lead to injury.
As it is, the floor has become an eyesore. For the diner who sees this, he or she may believe that all tile installations will do this and decide never to use ceramic tile at home. For the owner of the establishment, chances are high that the next flooring may not be tile. Essentially, the entire tile industry suffers.
Facts About the Tile Installation
Here are a couple of facts about this installation.
- The woodgrain plank was a 6”x 36” calibrated (not rectified) tile with a 6” (16.6%) offset, which can help eliminate lippage.
- The grout joint about a 1/16” which is less than the required joint size of 3/16” for a calibrated tile under ANSI A108.02 – 4.3.8.1.
- The lippage was just over 1/16” which is double the allowable 1/32”.
How to Avoid Lippage: Surface Prep!
Generally, surface prep is the first step to avoiding lippage. And yet, the reaction heard too often no matter where is either that “The general contractor won’t pay for prep work” from the installer or “Just get it done, it will be fine" from the GC.
Unfortunately, in most cases, it will not be fine and neither the owner nor the general contractor will accept the completed work.
Your job as Qualified Labor is to insist on surface prep up front. Here's advice for you.
1. Ensure the Substrate is Flat
It's truly critical to ensure before installing tile that the substrate is flat.
Surface prep, whether it is wall or floor is critical to the completed job being acceptable to the end user. If the substrate is not flat, the finished surface will mirror the irregular substrate which is especially true when ceramic tile is installed over concrete block walls as you see in the photos above and below.
In this situation, the GC would not pay the installer to properly “fix” the concrete block wall. Instead, he told the installer to simply use more thin set mortar to build up the low spots.
As we've described in another article, this was poor advice which unfortunately the tile installer followed.
>> See Don't Patch Your Tile Substrate With Thin Set
>> See Do You Have Enough Mortar to Accommodate Tile Warpage?
Facts About the Tile Installation
In this case, the job called for a four inch by twelve inch subway tile to be installed on the wall. This installation would fall under the ANSI A108.02-4.1.4.3.2 requirement which states,
“For tile with all edges shorter than 15in. (0.38m), the maximum allowable variation is no more than ¼” in ten ft. (6 mm in 3 m) and no more than 1/16 in. in 1 ft. (1.6 mm in 0.3m) from the required plane, when measured from the high points in the surface.”
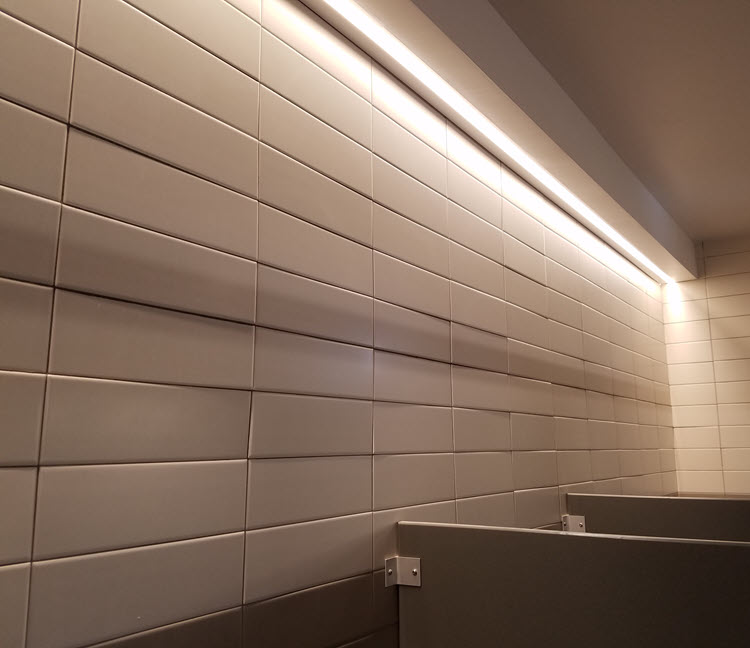
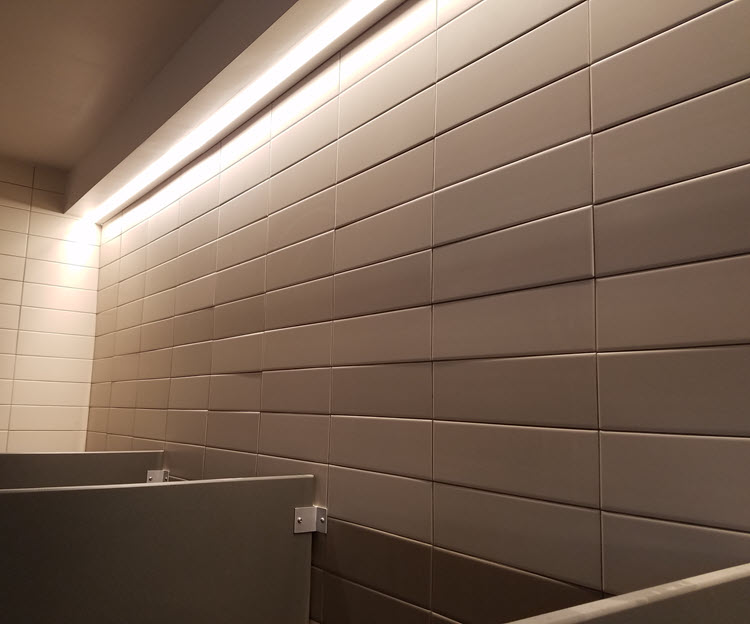
2. Beware Wall Wash Lighting!
To further complicate the problem, “wall wash” lighting was installed after the tile had been installed.
This type of lighting is installed in or on the ceiling directly above the wall. The cascading light accentuates any irregularities in the wall surface.
In this job, prior to the lighting being installed, tile work was acceptable. However, after the lighting was installed, the job was rejected by the owner and general contractor.
>> See Have You Adequately Prepped the Substrate for Tile?
Why You Should Avoid the 3 Hazards of Lippage
Here are are three lessons to be learned from these two examples.
1. The Substrate Must be Tile Ready
Always insist that the substrate is tile-ready. If not, send an RFI (request for information) to the architect and general contractor.
This puts them on notice (in writing) that there is a problem and that work will not begin until the surface is within ANSI tolerances.
If they reply (in writing) and instruct the installer to begin work, obtain a written and signed document that specifically tells the installer to start working without the appropriate corrections.
2. Follow Industry standards
Know when lippage can occur and implement tile installation methods, standards, and best practices as appropriate.
If you aren't already, become Qualified Labor. Certified Tile Installers stay in the know about new tile products and installation methods; they know how to consult the TNCA Handbook and ANSI Standards.
3. Permanent Lighting Must Be Installed Before Wall Tile Installation
Finally, permanent lighting must be installed before the tile is installed. Without this lighting, it is practically impossible for the installer to realize that there may be an issue with his or her work. Again, notify the GC (in writing) that work will begin only after the permanent lighting is installed.
Stand your ground or be prepared to redo the work and/or risk not being paid for your efforts.
Had the installer used the ANSI “tools” that are listed above, the lippage most likely would not have occurred, the projects would have been successful long-term, the owners delighted, and the tile industry would not suffer any ill effects.
Thanks for reading.
