Happy New Year! Are you ready to make tile installation resolutions for 2024?
If you're already in the know, think of these resolutions as a refresher. And, if you're new to the Ceramic Tile Education Foundation and the Certified Tile Installer Program, then consider this your introduction to a bold, new standards-based, methodical approach to installing ceramic tile.
>> See What's the Certified Tile Installer Program?
Tile Installation That's All About Quality
By now, you must know we take quality tile installation seriously.
Situations such as How Not to Install Tile on Floors, Walls, and in Showers make us ill; we break into hives and get very ugly. No homeowner should ever, ever find such poor tile work in his or her home.
Assuming you, too, feel the burn for quality, you'll take these 15 tile installation resolutions to heart for 2023!
>> See The Certified Tile Installers Credo
15 Resolutions to Make for 2024 About Tile Installation
1. Create a Tile Installation Mockup
In the tile world, mockups should be used by the tile contractor as a tool to obtain the approval of the owner, the architect, designer, and general contractor - all-important specifier constituents for the end project.
Demonstrating how the range of color of the tile, the tile pattern (if applicable), any inherent (actual) warpage, the size, texture, and color of the grout joints, and the appearance of the color-coordinating (not matching) sealant will appear "before" the work begins is a wise choice which can save time and money.
>> Read Why a Tile Installation Mockup is Really Necessary to learn more.

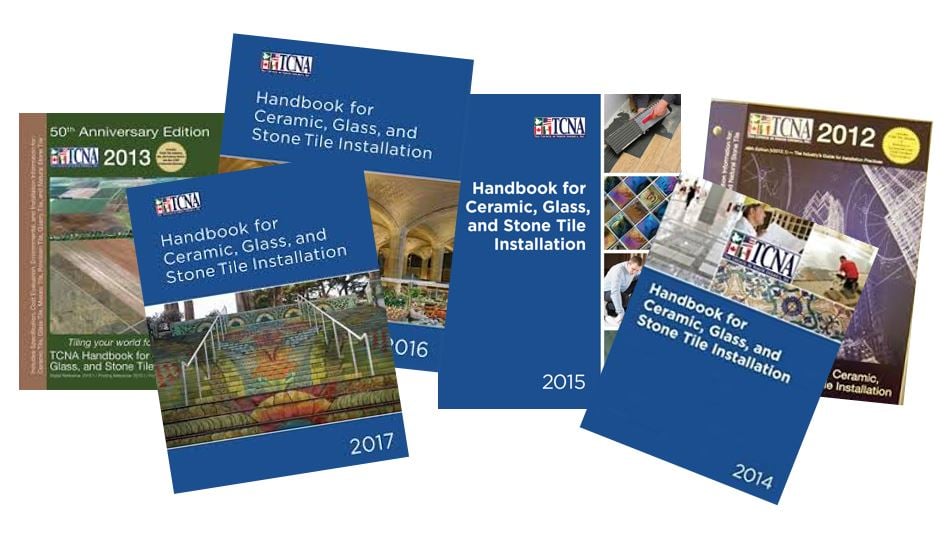
2. Study the TCNA Handbook and the ANSI Specifications
For continued success, tile installers should study the TCNA Handbook and ANSI Specifications, retaining as much as possible or at least knowing where to find the answers. These two books can and should be your best friend.
>> Read ANSI Standards: A Tile Installer's Best Friend!
>> Read The TCNA Handbook for Ceramic, Glass, and Stone Tile Installation
.jpg?width=300&name=NTCA-2019-20-Reference_Manual%20(348x450).jpg)
Their companion piece is the NTCA Reference Manual.
>> Read NTCA Reference Manual: An Invaluable Tool for the Tile Industry
3. Understand the Top Requirements for a Quality Tile Installation
What does it take to ensure that you have a quality tile installation? Based on our experience, knowledge, and work with the Tile Council of North America (TCNA) Handbook, we have identified ten requirements.
>> Read The Top Ten Requirements for a Quality Tile Installation
4. Plan for Expansion Joints in Your Tile Installation
Expansion joints, also known as Movement Joints or Movement Accommodation Joints, are essential and required in all tile installations. In ceramic, porcelain, glass, and stone tile installations, they are critical to the success and longevity of the installation.
>> Read Why Do You Need Expansion Joints When Installing Tile?
>> See Quick and Easy Movement Joints... the Right Way
>> See Honoring Expansion Joints in a Concrete Floor
You'll also find these related articles helpful:
>> Check out Offsets, Grout Joints, and Customer Expectations
>> Read Addressing Low Grout Joints with Tile Installation Standards
>> See Are Credit Card Grout Joints Specified? First Check Tile Industry Standards.
>> And How To Deal With Non-Linear Expansion Joints

5. Never Use Spot Bonding When Installing Ceramic Tile
Spot bonding either floor or wall tile places multiple globs or dollops of mortar (about the size of a golf ball) on the back of the tile. Doing so with larger-sized ceramic tiles means placing a glob of mortar on each corner with one in the middle of the back of the tile which is commonly known as “five spotting.”
This process fails every time because the majority of the tile is not supported or bonded by the mortar to the substrate. When a point load such as a refrigerator, piano, a pallet jack, or a woman’s high heel moves across these unsupported areas, the tile will crack.
Additionally, the void areas between the globs collect and hold moisture which can be fatal in exterior and wet (showers) area applications.
>> Read Why You Need to Eliminate Spot Bonding When Installing Ceramic Tile
6. Learn How to Trowel Mortar Correctly
The way you trowel mortar for setting tile makes a big difference.
Porcelain tiles, in particular, can withstand extra heavy service conditions by taking a lot of impact or point load when installed correctly over a sound substrate.
When the mortar isn't properly troweled, it can create unsupported spaces under the tiles which become weak spots that can be easily damaged by the same impact or heavy loads.
>> Read How to Correctly Trowel Mortar When Installing Tile?
.jpg?width=500&name=The%20Appropriate%20Mortar%20Can%20Accommodate%20(650x488).jpg "Have Enough Mortar to Accommodate Tile Warpage")
7. Ensure the Substrate is Tile Ready
The quality of the tile work seen by the consumer on the surface is only as good as what is underneath. This seems to be a simple statement, but if the appropriate prep work is not completed, the final appearance may not be acceptable.
>> Read Have You Adequately Prepped the Substrate for Tile?
8. Have Enough Mortar to Accommodate Tile Warpage
When you install tile, do you ensure that you have enough mortar to accommodate the inherent (actual) tile warpage associated with large format tile?
Tile sizes are changing; getting larger, longer, and proportionately having more inherent warpage. Likewise, changes are being seen in tile installation methods. In the past, thin-set mortars were most often used, but today we see large and heavy tile mortars used more often to accommodate most tile warpage.
>> Read Do You Have Enough Mortar to Accommodate Most Tile Warpage?
>> And, Never Assume You Have Sufficient Mortar Coverage. Check It.
9. Determine if Your Installation Surface is Adequately Flat
Especially when it comes to installing Large Format Tile (LFT), it's critical that you ensure you have a surface that is adequately flat according to tile industry standards. Not only is it a big deal but considering it before you get started is an even better idea.
>> See Is Your Floor or Wall Flat Enough for Large Format Tile?

10. Confirm Whether You Need a Flat Floor or a Level Floor
For that matter, you'll also want to confirm (and reconfirm in writing) whether your project calls for flat or level. There's a huge difference between the two.
>> See A Flat Floor vs. a Level Floor: What's the Difference?
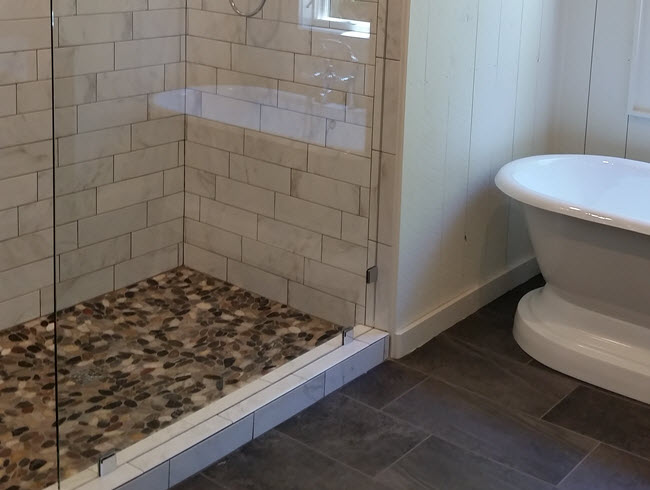
11. Don't Skimp on Slopes!
This is of particular concern when you install tile in wet areas. Be certain that all surfaces slope properly to the drain as required by tile installation standards and best practices.
>> Read Does Your Tile Slope To the Drain?
12. Understand What Leads to Efflorescence
We've all seen it: that really ugly white powder that can grow on cement grout, particularly when it's installed in areas where moisture is present (i.e., in a basement, shower area, or outdoors). That white residue is called efflorescence.
Many times, it's not the fault of the tile installation. If you understand what causes it to occur, you can take steps to lessen or eliminate efflorescence. This is what identifies a true tile installation professional.
>> Read Understanding Efflorescence aka that Ugly White Powder on Your Tile

13. Realize What Goes into Evaluating a Finished Tile Installation
This can sometimes be the most frustrating part of the project - for both the installer and the owner. Why? Because naturally occurring variations in the tile and other unexpected situations that fall within industry standards can produce a finished product that may not meet the owner's expectations.
So, in addition to always providing a tile installation mockup (see Resolution #1), be sure to consider and specifically address the four points detailed in the link below when you present the mockup.
>> See How to Evaluate a Finished Tile Installation
14. Attend Training Events That Provide New Skills and Knowledge
Industry groups such as CTEF, NTCA, and manufacturers have stepped up to this challenge by providing training events to increase your skills and knowledge in quality tile installation. These include:
- CTEF Educational Programs,
- The NTCA Workshops and Regional Training programs,
- The Remodeling Show in Baltimore and Portland,
- Total Solutions Plus,
- COVERINGS,
- TISE,
- Manufacturers’ training on the proper use and installation of their products.
>>Read Seeing Proper Tile Installation is Believing: Remodeling Show, Baltimore
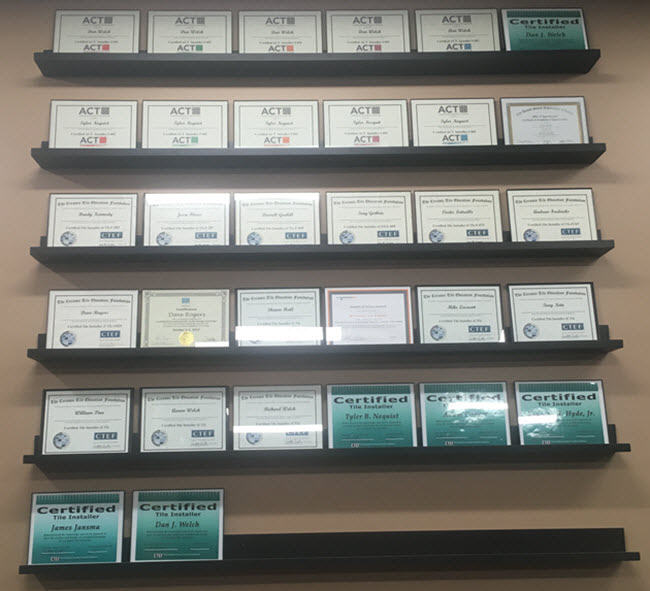
15. Become a Certified Tile Installer (CTI)
If you already provide top-quality workmanship in all of your projects, boost the confidence level of your consumers, architects, designers, and general contractors with the only credential recognized and promoted by the tile industry.
Additionally, many plans and specifications now call for the work to be completed by Certified Tile Installers.
Do it now! Become a CTI! Here's the CTI Credo for extra incentive: The Certified Tile Installers Credo
>>Read How To Differentiate Your Business With Tile Installation Certification
Need Tile Setters? Focus On Qualified Labor
The Tile Installation Experience with Scott Carothers at Coverings.
Are You Ready to Kick-off the New Year as a True Quality Tile Installation Professional?
Let us know what resolutions you have made for the New Year.
Have a Prosperous and Happy New Year!
From all of us at CTEF

Note: This article was originally published on 1/3/2017. We update it each year to inspire you!